


The objective of this tutorial is to learn how to establish a link between a Microsoft Access database and an application written in Visual Basic. At the end of this tutorial you should be able to:
Create a simple Access 97 database.
Create a suitable user interface for the database in Visual Basic.
Establish a link between MS Access tables and fields and appropriate interface controls in Visual Basic.
MS Access is a relational database that stores data (information) in fields which are then grouped together into records. A table is a collection of records which are all of the same type and structure. Fields are the smallest unit of data addressable in Access. Like VB fields specified in the ‘Random Access’ file type (i.e. Type... End Type), Access fields also need to be assigned a data type:
Related fields form records. For instance, a medical record could include the following fields: patient name, patient address, age, weight, height, history of operations, allergy list, notes, etc. Each patient would have one record. A single doctor’s set of patient records would then form a table. The overall medical database would then hold tables for all the doctors working in the current practice.
MS Access is a very powerful database with its own Basic language built in. However, this language is only a subset of Visual Basic, therefore sometimes a system may require a VB solution but still be handling large amounts of structured information. To overcome some of the limitations of Access it is possible to store the information in a standard Access database and to use VB to provide a user interface and any other facilities not possible with in Access.
Before connecting a database to a Visual Basic program one must first be created. For this tutorial we will build a database to hold information about books in a personal library.
Start Microsoft Access 97 database and select File/New Database. When prompted enter a suitable name such as ‘BOOKS.MDB’.
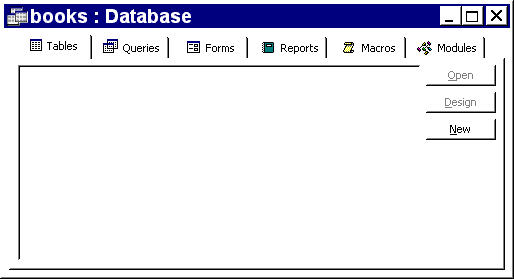
Now that a new database has been created its data structure must be specified. There should be a window open with 6 tabs representing: Tables, Queries, Forms, Reports, Macros, and Modules used in the database (see below). Click on the ‘Table’ tab and then select ‘New’ just above it.
Experienced Access users can create their own tables by hand, for the rest it is recommended that you use the Table Wizard to help with this process. Select the ‘Personal’ option button and then ‘Book Collection’ from the Sample Tables list. Next select fields from the Sample Fields list which will be used in each record. Select each field separately followed by clicking on the ‘>’ button. When all the fields have been specified click on the ‘Next >’ button at the bottom of the dialog box. Enter a suitable name, or accept the default, and click on ‘Next >’ again. One the final dialog box click on ‘Finish’, keeping the ‘Enter data directly into table’ option selected.
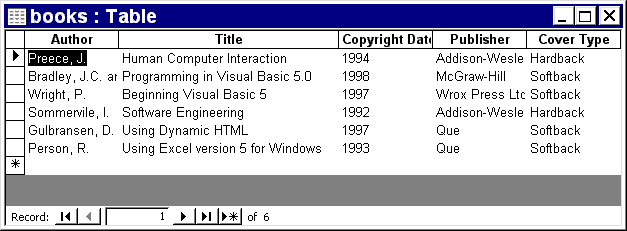
A table window should be open now so that data can be entered. Click in the first cell and enter appropriate information. Press <RETURN> or <TAB> to move to the next field. After all the fields in a record have been completed Access will make a new record. Each record represents information about one book in your personal library. The screen shot below shows three records in the Book Collection table (each row represents one record).
To save the data double click on the top left-hand icon on the table window. This saves any amendments to disk and closes the window at the same time.
Exit Access and start up Visual Basic.
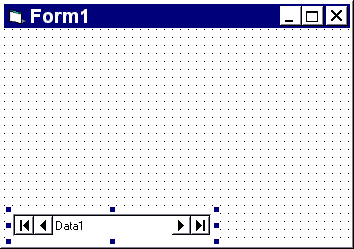
Once VB has loaded and there is a blank form displayed, click on the Data control icon  and draw a suitably large rectangle on the form. The resulting control on the form should be a short rectangle with two sets of arrows at the left and right hand ends of the object. These arrow buttons have exactly the same functions as the arrow buttons at the bottom of the table window in Access.
Although we now have a data control VB still does not know which database to access. There could be many databases on the current disk so we have to tell it which one we are dealing with. From the Properties window click on DatabaseName and then click on the button marked ‘...’. A file dialog box will appear where you can select the name of the Access database (e.g. A:\BOOKS.MDB).
Now that a database has been selected we can tell VB which table of the database to use. To do this click on RecordSource in the Properties window and then select the ‘Book Collection’ table from the combo box at the top.
So far we have created a data control on the form in VB so that an Access database can be attached. However, we still do not have any way to see or alter the information in the database. To do this some more controls will need to be added. Label controls can be added to display fields which will be read-only to the final user. Text controls, on the other hand, can display and update information (read and write access). Create a new text control on the form and go to the Properties window. Click on DataSource and select Data1 from the combo box. This tells VB that this control is going to get its data from the new Data1 control which itself is connected to the BOOKS.MDB database. However, Data1 handles all the information for the Book Collection table, the text control does not want the whole table but instead a single field. To do this click on DataField and select an appropriate field from the combo box (e.g. Title).
Repeat step 4 until there are enough controls to display all the information in the database.
Instead of relying on the Data control to change to different records in the database, special Recordset commands can be used. Set the Visible property of the Data control to False. Now alternative buttons can be added in the normal way using the command button control type. In the Click event place the following code to go to the next record:
  Private Sub Command1_Click()
    Data1.Recordset.MoveNext
  End Sub
Other commands include:
Add a new button or menu entry and label it ‘Find’ or ‘Search’. Next, in the event of the new control add the following code:
  Private Sub cmdFind_Click ()
    Dim SearchCriteria

    SearchCriteria = InputBox$("Enter Author to be found:", "Find Title")
    If Trim$(SearchCriteria) <> "" Then
      SearchCriteria = "Author = '" + SearchCriteria + "'"
      Data1.Recordset.FindFirst SearchCriteria
    End If

  End Sub
The string "Author = " is added to the start of SearchCriteria because this specifies which field in the table will be used for the search. To search a different field change this to an alternative field name.
Other useful commands:
Data1.Recordset.FindNext - Finds the next matching record in the current table. Use after a FindFirst command.
Data1.Recordset.NoMatch - Returns TRUE if no record has been found in the current table, else returns FALSE. Use this command after a FindFirst or FindNext command.
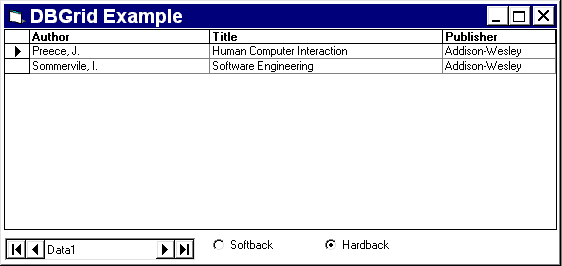
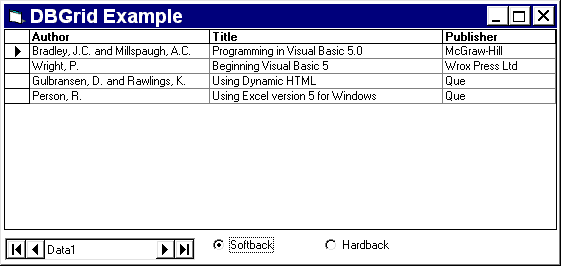
The example above created a form with various controls linked to an Access database, however only one record is visible at one time. While this is useful for data entry and modification, there are other times when details from more than one record will be seen at once. The DBGrid control is designed to display the details from multiple records in a similar way to the Table view within Access. To use the control select its  icon from the toolbar and draw out a rectangle on the form.
If a whole table is specified for the RecordSource property of the Data control then the DBGrid will display all fields for every record. A much more useful facility is the ability to display only a specific subset of fields and records from a table. To do this requires some knowledge of SQL. In the examples below a ficticious user is interested in the Author of each book, the Title and the Publisher. The user also wishes to be able to see Hardbacks and Softbacks separately. To do this option buttons can be added. The code for each option button is:
  Private Sub optHardback_Click()
    datBooks.RecordSource = "SELECT Author, Title, Publisher FROM Books WHERE [Cover Type] = 'Hardback';"
    ' The data control is updated
    ' which in turn updates the dbgrid
    datBooks.Refresh

    DBGrid1.Columns(0).Width = 2700
    DBGrid1.Columns(1).Width = 3500
    DBGrid1.Columns(2).Width = 1690
  End Sub

  Private Sub optSoftback_Click()
    datBooks.RecordSource = "SELECT Author, Title, Publisher FROM Books WHERE [Cover Type] = 'Softback';"
    ' The data control is updated
    ' which in turn updates the dbgrid
    datBooks.Refresh

    DBGrid1.Columns(0).Width = 2700
    DBGrid1.Columns(1).Width = 3500
    DBGrid1.Columns(2).Width = 1690
  End Sub
The code DBGrid1.Columns(0).Width = 2700 is used to alter the width of each column. The columns are numbered from zero. This code is placed in the Click event of each option button because the columns revert to default widths after the dbgrid is updated.
| Example 1: DBGrid showing all hardback books. |
|
| Example 2: DBGrid showing all softback books. |
|
 Download Access 97 Database example
 Tutorial 11 (Working with Files)
 Menu
Menu Tutorial 13 (Running Crystal Reports)