
The objective of this tutorial is to experiment more with VB’s graphics facilities. At the end of this tutorial you should know more about:
Creating animations using arrays of picture boxes.
Designing graphics using another package, such as Paintshop Pro, and import them into Visual Basic.
Incorporating images from other sources such as the clipboard and scanners.
Imaginative use of graphics and animation can greatly enhance an application. There is much scope for creativity when it comes to devising ways of acquiring, manipulating and using images. Microsoft’s Windows 95 and NT make quite extensive use of animation sequences: file copy, Recycle Bin emptying, Disk Defragmentation, Internet Explorer logo, etc. Other software houses as well are using animation; for example, Norton uses an X-ray baggage handler sequence to virus scan files in Norton Anti-Virus (see below).
Effective animation can be achieved by setting up a control array of picture boxes, which have their visible property set to False and a further picture box (visible) which is used to display the animation. A series of still images is then created, one in each of the invisible picture boxes.
Note: A control array can be set up by creating the first control, then using the copy and paste commands to create the require number of ‘clones’.
In the example below the telephones were created in Paint Shop Pro using the text tool. The telephone symbol was selected from the Wingdings font at 72pt. The handset was then cut out using the lasso tool, copied a few times, and then rotated varrying amounts to the left and right. To do this the colour depth had to be increased to 16.7 million, but after the rotations were complete this was put back down to 16 colours. Each phone was then saved into its own separate .BMP file. Next Visual Basic was started, a control array of empty picture boxes created and then the graphics files assigned to them. Two labels were added with the caption ‘Bring’ and also two timer controls. One timer to control the animation sequence speed and the other to control the two labels. The interface for this can be seen in the figure below.
Note: The still images used in the animation do not need to be displayed on the form side by side. To save space they could be arrange on top of each other:
The code necessary to create the illusion of animation is placed in one of the timers:
Private Sub tmrAnimate_Timer()
  Static PhoneNo As Integer

  imgAnimation.Picture = imgStill(PhoneNo).Picture
  PhoneNo = PhoneNo + 1

  If PhoneNo = 8 Then PhoneNo = 0
End Sub
The interval for this timer should be quite high (around 200). Experiment with different values to see what the effect is. The variable PhoneNo is declared as a Static so that other subroutines cannot access its value (and possible corrupt its contents), and also because a Local would loose its value every time the timer was called. The contents of the variable must be preserved between calls to the Timer subroutine so that we can use its value to control which still image is assigned to the animation image next.
The other timer is used to hide the show the two labels (lblBring1 and lblBring2) alternatively. The interval for this timer should be slower (about 1200) so that each label is displayed long enough to be seen.
Private Sub tmrText_Timer()
  If lblBring2.Visible Then
    lblBring2.Visible = False
    lblBring1.Visible = True
  Else
    lblBring1.Visible = False
    lblBring2.Visible = True
  End If

End Sub
Animation can be combined with moving position of the picture box dynamically. To do this add a line to the timer subroutine to change either the top or the left properties of the picture box which actually displays the animation (the stills do not require moving). To see this effect in action download the runner in ANIMATE.ZIP.
Here are a few ideas for sequences of images to create and animate:
Experiment with capturing screen images and manipulating them in a paint package such as Paint Shop Pro. To capture a Windows screen shot just hit the ‘Print Screen’ button on the keyboard and the image will be placed onto the clipboard. Switch to Paint Shop Pro and select ‘Paste’ from the ‘Edit’ pulldown menu. One application of this is to capture screen images, annotate them, and create an on-line multimedia help system. The figure below could be one such image of this proposed system.
Alternatively if you don’t want annotations all over the screen shot, load in just the image itself and then place some labels over the parts you want to provide help on. Next make the BackStyle of the labels Transparent and remove the caption. This should have the effect of a label which you can’t see but which can still recieve events as usual. Now add another label where you are going to display the annotations, rename it lblAnnotation. Go back to the labels over the picture and on the MouseMove event write the code you need to display the annotation (e.g. lblAnnotation.Caption = "Resize Handle"). Because the MouseMove event is used, when the application is run all the user has to do is point to the required part of the picture and the annotation label caption will update automatically.
For photo-realistic graphics on a PC scanners can be used to digitise paper-based pictures. Alternatively, there are many clip-art libraries sold on CD-ROM which also include photos, fonts and sound effects files.
Tip: For maximum image quality always scan in images at the size you will be using them in Visual Basic. Although an image box can resize a picture, enlarging it will cause it to become blocky. Most scanners should have an option to measure in pixels, use this to calculate how big the scan will look on the screen resolution you are using.
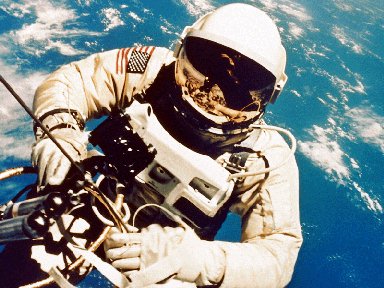
JPEG image (384 x 288)
Note: Although different graphics formats can hold the same images, some are more efficient than others. For example, if the above astronaut was saved in GIF image it would require 36K more disk space. However, GIFs are more efficient for small images like the arrow buttons at the bottom of this page.
Images on the WWW can be saved by right-clicking over the required image and then selecting ‘Save Image As...’ from the popup menu. However, always remember copyright laws. Small icons and buttons are normally OK to copy, but permission should be sought before downloading any larger images or company logos.
 Download animation example
 Tutorial 7 (Vertical and Horizontal Scroll Bars)
 Menu
Menu Tutorial 9 (Working with Multiple Forms)